7.29.2011

Lemon Bars


I made these lemon bars per a special request by my wonderful mother-in-law, Mary.   She and her friend Tish came to visit us in Portland a few weeks ago and we had such a blast!   We spent the week on a marathon tour of Portland and the surrounding area complete with a day of wine tasting, a trip to Multnomah Falls, and TONS of good food and drinks.

I’ve never attempted lemon bars and I couldn’t find a recipe in my grandma’s collection, so I did a little research and ended up using Ina Garten’s recipe from the Food Network.  (NOTE: I did reduce the amount of sugar in the filling from 3 cups to 2 ¼ and they were plenty sweet!)   The crust is delicious and the filling is akin to a really nice lemon curd - just as lemon bars should be.   All in all, this sweet treat was the perfect addition to our wine tasting picnic!

Lemon Bars

Crust:
2 sticks unsalted butter, room temperature
1/2 cup sugar
2 cups flour
1/8 teaspoon salt

Filling:
6 extra-large eggs, room temperature
2 1/4 cups sugar
2 tablespoons grated lemon zest
1 cup freshly squeezed lemon juice
1 cup flour
Powdered sugar, for dusting
 
Technique:
  1. Preheat oven to 350.   Grease and flour 9x13 baking dish.
  2. For crust, cream butter and sugar (with paddle attachment if available).   Combine flour and salt and gradually add to butter and sugar mixture with mixer on low speed.
  3. Dump dough onto well-floured board and work into a ball, then flatten to a disc.
  4. With well floured hands, press dough into prepared baking dish, until flat and level.
  5. Chill for 15 minutes then bake crust for 15 – 20 minutes until very lightly browned.   Let cool on wire rack.
  6. Leave oven on at 350 and make filling as soon as crust comes out of the oven.
  7. For filling, whisk together eggs, sugar, lemon zest, lemon juice, and flour.
  8. Pour filling over crust and bake for 30 minutes, until filling is set.
  9. Let cool to room temperature, then chill for 2 hours before cutting.
  10. Cut into squares and dust with powdered sugar.
 Brittany’s Tips
  • I worked the dough for the crust a little bit before forming it into a ball and pressing into baking dish; this seemed to make it hold up a little better.  Also, don’t forget to let it chill before baking it.
  • Make sure to let the lemon bars chill for at least 2 hours before cutting into squares.  This allows the filling to set all the way.
  • Store in refrigerator and enjoy for up to 1 week. 
Happy Baking!

7.19.2011

Decoration Fail

Zach and I happened upon this picture today and we laughed so hard, I just had to share it with all of you.  This is exactly how I feel sometimes with my own decorating endeavors....

7.12.2011

Italian Cream Cake


For Father’s Day, I told Dad he could choose his favorite “Grandma Jones” cake and I’d do my best to recreate it.  Of course, he chose the ever popular, somewhat difficult Italian Cream Cake, so I decided to enlist some help from Mom since she has mastered this recipe over the years. 

I learned two things from making this cake with Mom:
  1. I MUST invest in a stand mixer!!  It is so much easier (especially anytime you are peaking egg whites) to just set it up and let it go.  Anyone out there want to buy me a Kitchen Aid Mixer? 
  2. It’s a lot more efficient to bake as a team – and a whole lot more fun! 
Overall, the cake turned out fantastic!  It is, however, a mammoth and neither Mom nor I could find a cake dome to fit over the top.  I may consider making it as a two layer cake next time as covering and store the three layer variety posed some definite problems.


Also, the original recipe calls for mixing the nuts into the cream cheese frosting, but I found that made it really difficult to frost the cake and it felt more like spackling than frosting.  I suggest leaving the nuts out of the frosting and just covering the sides with crushed nuts after assembly.

Italian Cream Cake

2 cups sugar
5 eggs, separated
1 stick butter, room temperature
1/2 cup shortening
2 cups cake flour
1 cup buttermilk
1 cup shredded coconut, sweetened
1 teaspoon baking soda
1 teaspoon vanilla

Technique: 
  1. Preheat oven to 325.  Grease and flour 3 round cake pans. 
  2. Cream butter and shortening. 
  3. Gradually add sugar. 
  4. Add egg yolks one at a time beating well after each addition. 
  5. In small bowl, mix together buttermilk, vanilla, and baking soda. 
  6. Alternate adding flour and buttermilk mixture to sugar mix beating slowly, beginning and ending with flour. 
  7. Stir in coconut by hand. 
  8. In separate mixing bowl, beat egg whites on high until stiff peaks form, approximately 5 – 7 minutes. 
  9. Gently fold in egg whites to cake batter until incorporated. 
  10. Divide batter equally into prepped cake pans. 
  11. Bake for 40 minutes until toothpick inserted in the center of each cake comes out clean. 
  12. Cool on wire rack for approximately 10 minutes.  Then, flip cakes out of pans and cool completely before assembling. 
Cream Cheese Frosting

1-8oz cream cheese, softened
1/2 stick butter, room temperature
16 oz powdered sugar
1 teaspoon vanilla
1 teaspoon lemon juice

Technique:
  1. Mix together all ingredients. 
Assembly

3 cake layers
Cream Cheese frosting
1 cup of crushed nuts, walnuts or pecans 

Technique:
  1. Place first layer on cake platter and line strips of parchment underneath to keep cake plate clean. 
  2. Spread a layer of frosting on first layer and top with second cake layer.  Repeat for third layer. 
  3. Frost top and sides of cake. 
  4. Sprinkle sides of cake with crushed nuts. 
  5. Remove parchment strips. 
Brittany’s Tips 
  • I’m officially addicted to Pillsbury Softasilk Cake Flour – the last three cakes I’ve made using this enriched cake flour have turned out wonderfully with just the right texture. 
  • Be very gentle when incorporating the egg whites to the cake mixture.  Add about half of the egg whites and fold until almost incorporated; then, add the remainder and fold until just incorporated – try not to over mix. 
  • I usually set out the cream cheese overnight that way it will be nice and soft and give you that extra creamy frosting consistency. 
  • If the frosting is a little too thick to spread, feel free to add a little hot water to thin it out. 
Happy Baking!!

7.07.2011

Mandarin Orange Cake

Summer has finally arrived in Portland, so I thought it was time to dust off my favorite summer cake recipe.  Not only is it super delicious, but incredibly quick and easy too!


I don’t use a lot of cake mixes, but I do have a few “go to” recipes that start with a cake mix base.  I may try nixing the mix next time in favor of making my own butter cake, but for now, we’ll stick to the old faithful method.

Mandarin Orange Cake 

1 Duncan Hines Butter cake mix
4 eggs
1 cup vegetable oil
1-11 oz can mandarin orange sections, undrained

Technique:
  1. Preheat oven to 350.  Grease cookie sheet or jelly roll pan. 
  2. Mix cake mix, eggs, and oil together. 
  3. Gently fold in orange sections. 
  4. Pour into greased pan and bake for 20 minutes until a toothpick inserted in the center comes out clean. 
  5. After cooling cake completely, frost and refrigerate for at least 2 hours before serving. 
Frosting 

2 cups heavy whipping cream
1 1/2 cups powdered sugar
1 teaspoon vanilla
1 small vanilla instant pudding mix
1-16 oz undrained crushed pineapple

Technique:
  1. Combine whipping cream, powdered sugar, and vanilla.  Beat on high until stiff peaks form. Approximately 5 minutes. 
  2. Stir in pudding mix and pineapples until fully incorporated. 
Brittany’s Tips 
  • I usually drain the mandarin orange slices just a little before folding into the cake mixture.  I drain about 1/3 of the liquid so it doesn’t make the cake too soggy. 
  • Make sure your baking pan has at least 1 inch sides…so obviously a completely flat cookie sheet won’t work. 
  • This cake will keep in the refrigerator for at least a week and in fact tends to be better 2 or 3 days after you make it. 
  • This is a thin sheet cake, so I like to double up slices and serve it like a two layer cake. 

Enjoy the Sunshine and Happy Baking!

6.24.2011

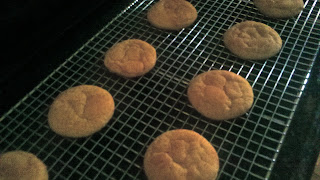
Snicker Doodles

I had another close friend, Kelly, turn 30 this week and to celebrate she planned an awesome mid-week, urban hike in the downtown Portland area.  Along with the other necessities -- water, sunscreen, etc – I decided to bring along a batch of Snicker Doodles to sustain us on our long journey.  It was my first time making the recipe solo, but the cookies certainly did not disappoint! 


Snicker Doodles

1 1/2 cups sugar
1/2 cup butter, softened
1/2 cup Crisco
2 eggs
2 3/4 cups flour
2 teaspoons cream of tartar
1 teaspoon baking soda
1/4 teaspoon salt

Technique:
  1. Combine flour, cream of tartar, baking soda, and salt in medium bowl and set aside. 
  2. Mix together butter, Crisco and sugar. 
  3. Add eggs, one at a time beating after each addition. 
  4. With mixer on low speed, gradually add flour mixture until fully incorporated. 
  5. Cover dough with plastic wrap and refrigerate for at least 2 hours. 
  6. Preheat oven to 375. 
  7. Mix 2 tablespoons of sugar with 2 teaspoons of cinnamon. 
  8. Form dough into balls (each approximately the size of a walnut) and roll in cinnamon and sugar mixture.  
  9. Place on ungreased cookie sheet and bake for 8 – 10 minutes. 
Brittany’s Tips

  • For even baking, consider investing in a Silpat, or other non-stick silicone baking mat. 
  • The cookies will start to crack a little on the top as they cool, so don’t be alarmed – that’s a good sign. 

Happy Baking!

6.19.2011

Lemon Layer Cake

Photo Courtesy of America's Test Kitchen
One of my closest friends, Cristina, had her 30th birthday last week, so naturally I volunteered to make the cake – what better occasion to make a whole cake and NOT leave it around the house for me to eat on all week!  I was very excited because Cristina requested either a lemon or a coconut cake and I had just so happened to be dying to try making a cake with homemade lemon curd. 

My mom recently ordered “The Complete America’s Test Kitchen Cookbook” after rave reviews from friends at church.  Since I couldn’t find a lemon curd cake recipe in my grandma’s stockpile, I thought, why not try out Mom’s new cookbook.  After some perusing, I chose a recipe for lemon layer cake, which is a white butter cake, lemon curd filling, and a classic 7 minute frosting (with a new improved method that’s practically fool proof). 

Overall, the cake turned out amazing!  It was pretty time consuming and I did have a bit of a mishap with the eggs; subsequently, making two additional trips to the store along with several extra cartons of eggs.  But in the end, it tasted great and it was definitely a crowd pleaser.  I’m also an America’s Test Kitchen convert – the recipes can be long and somewhat involved, but if you just follow the step by step process, chances are it will turn out great!

My cake - I promise I'll work on my photography skills.  This picture doesn't do it justice!


Lemon Layer Cake 

White Butter Cake

2 1/2 cups cake flour, plus extra for pans
1 cup whole milk, room temp
6 large egg whites, room temp
1 1/2 teaspoons vanilla
1 3/4 cups sugar
4 teaspoons baking powder
1 teaspoon salt
12 tablespoons unsalted butter, cut into 12 pieces, softened but still cool

Technique:
  1. Adjust an oven rack to the middle position and heat oven to 350.  Grease and flour two 9-inch cake pans and then line with parchment paper. 
  2. In a medium bowl, whisk together the milk, egg whites, and vanilla. 
  3. In a standing mixer, fitted with a paddle attachment (if you have one) mix the flour, sugar, baking powder, and salt at low speed until combined. 
  4. With mixer at low, add the butter one piece at a time continuing to beat until the mixture resembles moist crumbs with no visible butter. 
  5. Add all but 1/2 cup of the milk mixture and beat at medium speed until pale and fluffy. 
  6. With the mixer at low speed, add remaining milk mixture then increase the speed to medium and beat for 30 seconds. 
  7. Stop mixing and scrape sides of bowl, then mix another 20 seconds at medium speed. 
  8. Divide batter evenly between the pans and lightly tap on the counter a few times to settle the batter. 
  9. Bake at 350 for 20 – 25 minutes, rotating midway through baking, until a toothpick inserted in the center of each layer comes out clean. 
  10. Cool cakes on a wire rack for 10 minutes, then run a small knife around the edges of the cake and flip out onto the wire rack.  Peel off parchment paper and turn cakes right side up to finish cooling completely before frosting, approximately 2 hours. 
Lemon Curd Filling

1 cup juice from about 6 lemons 1 teaspoon powdered gelatin
1 1/2 cups sugar
1/8 teaspoon salt
4 large eggs, plus 6 egg yolks (reserve whites for cake)
8 tablespoons unsalted butter, cut into 1/2 inch cubes and frozen

Technique:
  1. Measure 1 tablespoon of lemon juice into a small bowl; sprinkle with gelatin over the top and set aside. 
  2. Heat remaining lemon juice, sugar, and salt in a medium saucepan over medium-high heat stirring occasionally until sugar dissolves and mixture is hot, but not boiling. 
  3. Whisk the eggs and yolks in a large bowl.  Whisking constantly, slowly pour the hot lemon sugar mixture into the eggs and return mixture to saucepan. 
  4. Cook over medium-low heat, stirring constantly, until mixture registers 170 on an instant-read thermometer and is thick enough to leave a trail when stirring, approximately 4 – 6 minutes. 
  5. Immediately remove the pan from heat and stir in gelatin mixture until dissolved. 
  6. Stir in frozen butter until incorporated. 
  7. Pour filling through a fine-mesh strainer into a bowl and lay sheet of plastic wrap directly on the surface and refrigerate until firm enough to spread, at least 4 hours. 
Classic 7 Minute Frosting

1 cup sugar
2 large egg whites, room temp
1/4 cup water
1 tablespoon lemon juice
1 tablespoon corn syrup

Technique:

  1. Combine all ingredients in the bowl of stand mixer or a large heatproof bowl and set over a medium saucepan filled with 1 inch of barely simmering water. (Do not let bottom of bowl touch water.) 
  2. Cook, stirring constantly, until instant-read thermometer registers 160, approximately 5 – 10 minutes. 
  3. Remove from heat and transfer to stand mixer.  Beat on medium speed until soft peaks form, about 5 minutes. 
  4. Increase speed to medium-high and continue beating until mixture has cooled to room temp and stiff peaks form, approximately 5 more minutes. 
Brittany’s Tips 
  • For best results, read the directions all the way through once so you don’t miss little things like saving 6 egg whites from the lemon curd for the cake – thus one reason for my additional trip to the store for more eggs. 
  • Remember baking is a science and every little step counts, so make sure to let your milk and egg whites come to room temp before baking, because it will make a difference. 
  • When separating egg whites from yolks, have a separate bowl from the main mixture so if you get a little yolk in the whites, you won’t ruin the whole mixture, just that one egg. 
  • Anytime you are pouring a hot mixture into eggs, make sure to do it very slowly and a little bit at a time, otherwise you run the risk of scrambling your eggs. 
  • The double boiler technique can be scary for some, but as long as you make sure the water isn’t touching the bottom of the bowl and it’s just at a nice simmer, everything should turn out okay. 
  • When checking temperatures with an instant-read therometer, make sure you aren’t touching the sides of the bowl with the probe, just the liquid mixture – you’ll get a much more accurate reading. 
  • The best prep sequence for this cake is to make the lemon curd first, then the cake after a few hours.  Wait until the cake is assembled before making the 7 minute frosting. 
  • To assemble, line the edges of a cake platter with strips of parchment to keep platter clean. Using a serrated knife, cut each cake horizontally into two even layers.  Place first layer on cake stand and spread approximately 1 cup of lemon filling evenly on the cake.  Repeat until cake is assembled.  Frost, remove parchment paper strips, and enjoy! 
Happy Baking!!


6.11.2011

John's Brownies

Last weekend, we had an unexpected visit from our good friends Becca and Ben Swanson, so I thought it would be a perfect time to whip up some of Grandma’s Brownies.  These brownies (aka John’s Brownies – they’re my brother’s fav!) were always a big hit in our family; in fact, the comment on my recipe card from Mom says “John and Grandma made these brownies quite often and they were usually gone by the next day!”  I remember coming home on the first day of school every year and going straight to grandma’s house for a batch fresh out of the oven.

This particular brownie happens to be one of my favorites too because they are topped with a delicious chocolate frosting.  And for those of you who know me well, you know I have an insatiable taste for frostings of every kind.  (Let me say, if you don’t really like frosting on your brownies, just try it for this recipe because it really completes the dessert, if you don’t like it, you can do without on your next batch.)


John’s Brownies

1 stick butter
3 tablespoons cocoa
1 cup sugar
2 eggs
1 teaspoon vanilla
1 cup flour
1/2 teaspoon baking powder
1/4 teaspoon salt
1/2 cup walnuts, optional

Technique:
  1. Preheat oven to 350.  Grease 9 x 9 square pan. 
  2. Combine flour, baking powder, and salt and set aside. 
  3. Melt butter and cocoa in small saucepan over medium heat stirring constantly. 
  4. Add sugar, then eggs (well-beaten), and vanilla stirring constantly. 
  5. Gradually stir in flour mixture. 
  6. Pour into greased pan and bake for 20 – 25 minutes until toothpick inserted in the center comes out (mostly) clean.  (Be careful not to over bake.) 
Chocolate Frosting

3 tablespoons butter
3 tablespoons cocoa
1 teaspoon vanilla
2 tablespoons hot water
1 cup powdered sugar

Technique:
  1. Melt butter and cocoa in small saucepan over medium heat stirring constantly. 
  2. Remove from heat, add remaining ingredients and stir until smooth. 
Brittany’s Tips
  • If you cut the butter into cubes, it will heat more evenly and mix better with the cocoa.  I usually start the butter and as it begins to melt, I gradually add in 1 tablespoon of cocoa at a time until it’s completely mixed and smooth. 
  • Don’t over stir the brownie batter.  You just want to make sure the flour is incorporated and then stop. 
  • Make sure to let the brownies cool a bit before frosting.  Otherwise, the frosting will melt off and pool around the outsides of the pan. 
  • I was feeling a little crazy this time and decided to add in a layer of marshmallows between the brownie and the frosting to make a Rocky Road variety if you will.  To do this, layer mini marshmallows on top of the brownies as soon as they come out of the oven and then cover in foil.  This will melt the marshmallows and give you a better surface to add the final frosting layer. 
Happy Baking!

6.03.2011

Chocolate Chip Cookies & Golf


I’ve recently taken up “golfing”…I use that term rather loosely as a round of golf for me generally consists of the following:

Stage 1:  Feeling confused and overwhelmed with the tee off traffic and thus refusing actual game participation until roughly the 3rd or 4th hole. 

Stage 2:  Also known as the “serious” play stage and lasting approximately 2.3 holes, during which time I may have one really good drive (75+ yards) and some solid tries with the 7-iron and putter.  This particular game stage inevitably comes to a close with something like an impressive 15-stroke par 4.

Stage 3:  You may also want to refer to stage 3 as the tantrum phase.  At this point, it’s best for me to pack it in or risk the very real possibility of impaling someone (accidentally, of course) with a 3-wood and subsequently ending up with a $10,000 lawsuit. 

However, I have been putting lots of time in at the driving range with Zach and while I won’t be trying out for the LPGA any time soon, I have managed to improve a bit and I’m happy to report I can (almost) consistently make solid contact with the ball.  Something about practice makes perfect seems to be repeating in my head at the moment. 

But, I’m sure you’re asking yourself “What in the world does this have to do with baking?”  Well, let me explain… 

For the last several years, I have managed to perfect my version of the chocolate chip cookie, so for the second blog recipe I thought I’d share my tips for America’s favorite cookie.  I set out to make them as always, remembering to incorporate all the little things that seem to make them come out just right every time, but upon tasting the first batch, they just weren’t as good as usual.  Here’s where the golf analogy ties in – from my very limited golfing experience I’ve discovered that just when you think you’ve got one thing fixed something else goes wrong.  Say you finally perfected your swing, but now your aim’s off or you’ve hit 8 great drives in a row, but can’t seem to even make contact with the ball on the 9th drive. 

Baking is the same way; sometimes a batch just doesn’t turn out quite right.  We have to remember baking is an artistic form of science and there are so many little things that can affect the outcome.  So, next time your baking project doesn’t yield the results you want, don’t worry about it, it happens to all of us!

Chocolate Chip Cookies
*This is the Original Nestle Toll House recipe - by far the best out there!

2 1/4 cups all-purpose flour
1 teaspoon baking soda
1 teaspoon salt
1 cup (2 sticks) butter, softened
3/4 cup granulated sugar
3/4 cup packed brown sugar
1 teaspoon vanilla extract
2 eggs
2 cups semi-sweet chocolate chips
1 cup chopped nuts

Technique:

Combine flour, baking soda and salt in a small bowl and set aside.  Beat butter, granulated sugar, brown sugar and vanilla in large mixing bowl until creamy.  Add one egg at time, beating well between each addition.  Gradually beat in flour mixture.  Stir in chocolate chips and nuts.  Refrigerate for 30 minutes.

Drop dough onto cookie sheet (approximately 1 heaping tablespoon of dough per cookie).  Bake at 375 for 10 – 13 minutes or until golden brown. 

Brittany’s Tips

  • Melt butter in microwave for approximately 30 seconds before adding sugars and vanilla.
  • Don’t over mix the dough.  As soon as the last of the flour mixture is incorporated stop mixing.
  • Make sure to refrigerate the dough before baking.  This will ensure all batches bake evenly and turn out uniformly. 
  • When forming the dough, make sure all of your cookies are the same size.
  • Take the cookies out of the oven a little before you think you should and then set the timer for 2 minutes and let them continue baking on the hot cookie sheet.  They'll darken up as they sit and cool.
Happy Baking!

5.27.2011

Chocolate Meringue Pie

As bakers, we all have our “arch nemesis” dessert…that one cake or pie that just never turns out the way you want it to no matter how many different techniques or varieties you try.  For me, it’s German chocolate cake (ironically, my husband, Zach’s, favorite!) but for my mom, it’s Grandma’s chocolate meringue pie. 

I’ll never forget the day Mom attempted her last-ditch “chocolate pie” effort.  Dad and I had witnessed the head to head battle between Mom and her chocolate pie on many, many prior occasions, so of course we were anxiously awaiting what we hoped would be the crowning glory of chocolate pies, something so perfect, all the failed attempts would be but a bad dream.  After what seemed like hours, Mom finally emerged from the kitchen with one of the most beautiful pies I’ve ever seen...perfectly golden crust, caramelized meringue peaks, the whole nine yards…it was spectacular! 

One quick glance at Mom though and we knew something wasn’t right.  She proceeded to silently (and forcefully) drop the pie on the coffee table and then to our utter surprise, she scooped up a handful of that seemingly perfect pie and we watched as the un-solidified chocolate pudding mixture dripped from her hand and formed a nice little liquid pool right in the center of the pie.  After a brief moment of shock, we started laughing hysterically and Dad and I both dug in, bare hands and all.  It sure tasted great even though it looked a bit of a mess by the time we finished with it. 

So, the moral of the story:  If at first you don’t succeed, try, try again…and if you still fail, oh well!  In the words of the great Julia Child “never apologize”.  Just because something doesn’t look perfect, doesn’t mean it still won’t taste great.


Chocolate Pie Filling

1 cup sugar
1/4 cup cornstarch
1/4 teaspoon salt
1/4 cup cocoa
3 cups milk
4 eggs, separated
3 tablespoons butter
1 1/2 teaspoons vanilla

Technique:

Separate egg yolks from whites; set aside whites.  In medium saucepan, combine sugar, cornstarch, salt, cocoa, and milk and cook on medium-low heat, stirring constantly.  Once mixture begins to bubble and thicken, cook for 2 more minutes and remove from heat.  Beat yolks and gradually add about one cup of hot mixture to egg yolks.  Return egg mixture to saucepan and continue cooking on medium-low heat until it reaches a gentle boil; cook for 2 more minutes.  Remove from heat and stir in butter and vanilla.  Once butter has melted, pour mixture into pre-baked piecrust.  Top with meringue and bake at 325 for 15 minutes or until meringue is browned.  Let pie cool completely before serving. 

Meringue Topping

4 egg yolks
1/2 cup sugar
1 teaspoon vanilla

Technique:

Beat egg whites on high speed until frothy.  Gradually add sugar while continuing to beat constantly.   Beat for approximately 5 minutes until stiff peaks form.

Piecrust

6 tablespoons butter, chilled
2 tablespoons lard, chilled
1 cup flour
1/2 teaspoon salt
Cold water in spray bottle

Technique:

Cut butter and lard into small cubes and chill in freezer for 15 minutes.  Combine flour and salt in food processor and pulse 6 times to mix.  Add chilled butter and pulse 8 times.  Add chilled lard and pulse 8 more times.  Spritz mixture with water until damp and pulse 5 times.  Continue adding water until dough holds together when squeezed. 

Form dough into rounded disc and chill for 30 minutes.  Roll out to 10 – 11 inches and place in greased pie pan.   Pinch and trim edges as needed.

If recipe calls for pre-baked crust, blind bake until golden brown.   For information on blind baking and other helpful tips, check out Alton Brown's piecrust recipe.

Brittany’s Tips

Okay, so this was my very first chocolate meringue pie and I have to say, I’m quite pleased with the way it turned out.  Here are a few pointers I picked up along the way:


  • Feel free to use a store bought piecrust, although Alton Brown has a foolproof technique that I’ve used for the past few years.  Check it out here.  I especially like his method of rolling out the dough; it’s very efficient and keeps your kitchen counter much cleaner.  (However, for blind baking, I suggest using foil instead of parchment paper.) 
  • Meringues can be finicky.   The egg whites peak best when they are at room temperature.  Once you start making the meringue, don’t stop halfway through.  Be ready to continue mixing until you get to the desired consistency.  If you don’t like meringue, you can always substitute whipped cream instead, BUT please, please make your own…it’s so easy and infinitely better than Cool Whip.  
  • Be careful to use a large enough piece of parchment paper when pre-baking the crust so you can easily lift out dry beans after the first 10 minutes of baking.  (I almost had a near disaster this time and subsequently ended up picking lots of beans out of the crust midway through the baking process…not fun!) 
  • Remember, the filling is already cooked, so you’re really just looking to get a nice golden brown color on your meringue when you bake it at the end.  If you are using whipped cream, skip the oven time and just let the pie cool completely before topping it with the whipped cream.
  • It is VITALLY important to wait until the pie is completely cool before cutting it.  If you have the urge to dig in immediately, picture the middle of your beautiful pie underneath a puddle of chocolate because you run the risk of not allowing it to set all the way.  Be patient, give it a few hours, you’ll be so glad you did!

I hope you all enjoy the long weekend and might I suggest rounding out your Memorial Day meal with a chocolate pie of your own!  Good luck and feel free to ask questions or post your own tips and tricks.

Happy Baking!

5.25.2011

About Brittany's Bakery

Some of my earliest memories are baking with my Grandma Jones, sneaking tastes of the cookie dough or  buttercream frosting when I thought she wasn't looking.  Of course, she knew exactly what I was doing and didn't mind doing a little "quality control" herself just before the beaters were tossed into the sink.  She was an amazing baker and cook and truly loved every minute she spent in the kitchen.  Growing up next door to her and grandpa, we ate most of our meals at their place and dinner was never complete without an equally fantastic dessert.  Pies, cakes, brownies, cookies...you name it, she made it (AND perfected it)!


I've recently found myself with loads of free time as I'm unemployed for the first time since I was 16 years old!  So, I thought, why not use my newfound freedom to dust off the old recipe box and try out some of my grandma's tried and true recipes.  I hope you enjoy these recipes as much as I do and I would love for you to share your family favorites too.

Happy Baking!!